
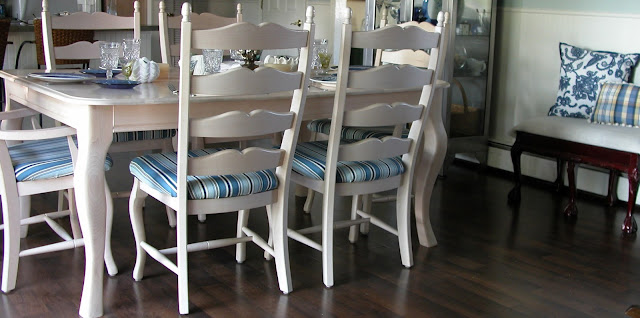
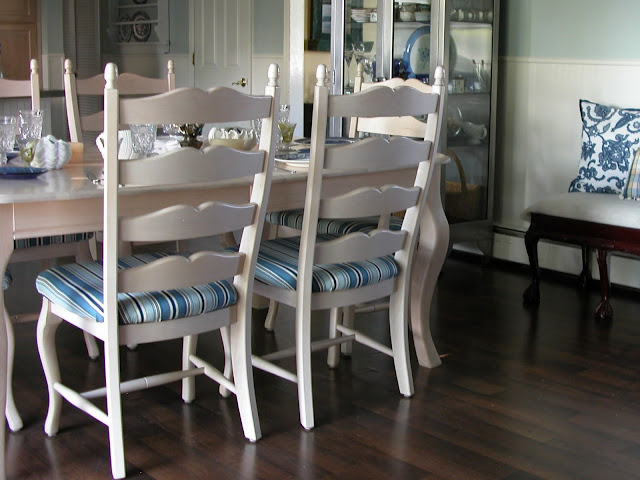
Changing the fabric on dining room chairs is easy to do. I wanted a nautical feel and fell in love with this blue and white stripe fabric.

Oh! because I changed the fabric on the chairs I had to purchase new curtains to complete the look. I found new curtains at Home Goods at $16.00 for the pair.

The first step was to take the cushions off. ( I did one chair at a time.) Next lay the fabric out, measure, and cut to size. Leave at least 2" extra to allow for any mistakes. This is the first time I attempted this kind of project.
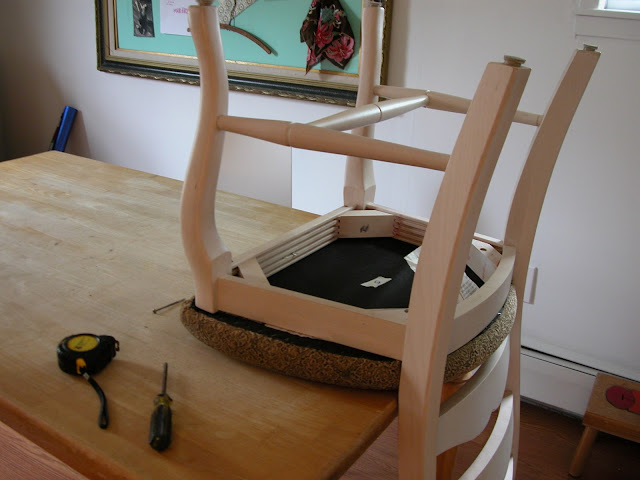

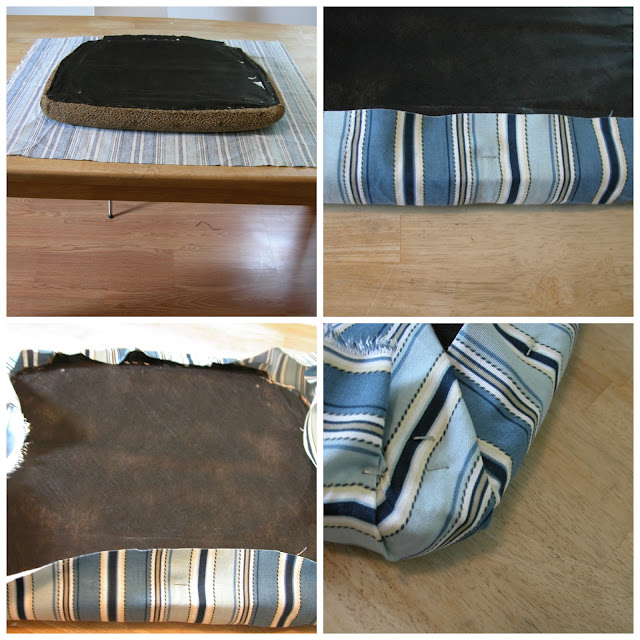
Once I measured and cut, I put the cushion on top of the fabric with the front side of the cushion facing me and pulled the fabric tightly over and gave it one staple in the middle. Then I did the same for the back and the sides. Once each side had one staple, I went back to the front of the cushion and stapled along the edge out to each corner leaving one inch between each staple. Leave the corners for last and fold those over like your wrapping a present. Give the corners at least three staples. Trim any excess fabric. Don't worry if it doesn't look perfect. Remember no one will see under the chair. (Let's hope not a least.)

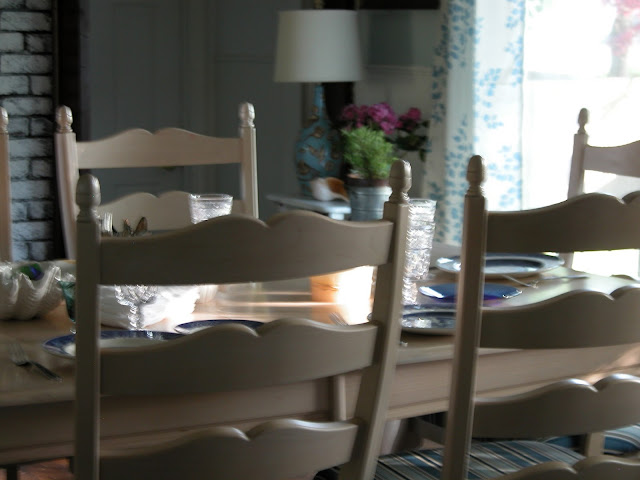
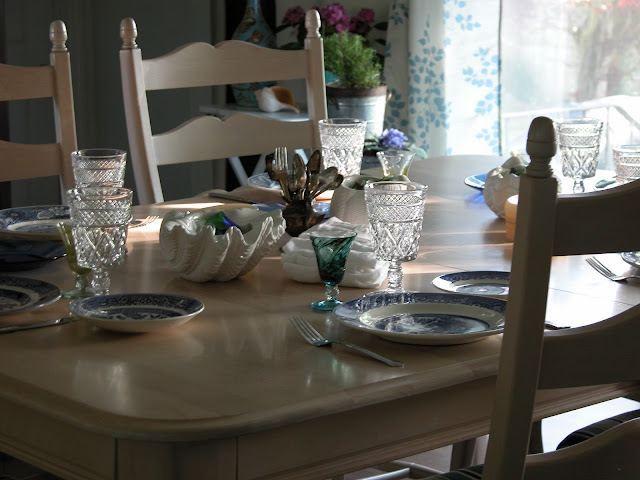
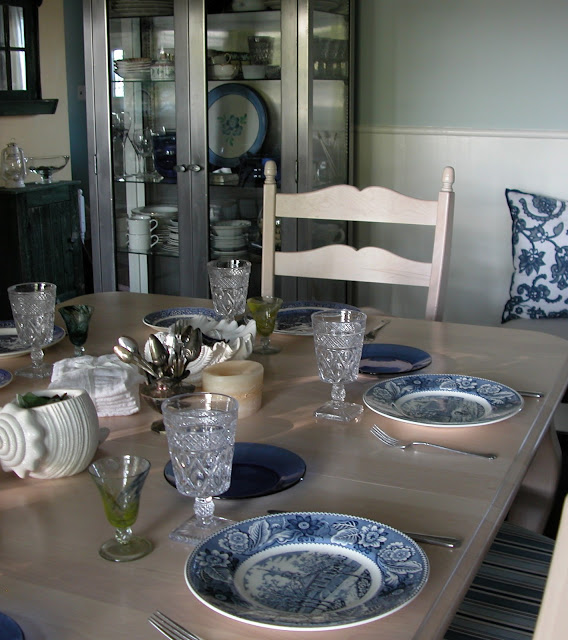
The table is set with blue and white plates
 .
.


For this project, I used 4 1/2 yards of fabric to cover six chairs.
BEFORE

Here is my step by step tutorial:
Tools you'll need a measuring tape, scissors, screwdriver, staple gun.
The first step was to take the cushions off. ( I did one chair at a time.) Next lay the fabric out, measure, and cut to size. Leave at least 2" extra to allow for any mistakes. This is the first time I attempted this kind of project.


Once I measured and cut, I put the cushion on top of the fabric with the front side of the cushion facing me and pulled the fabric tightly over and gave it one staple in the middle. Then I did the same for the back and the sides. Once each side had one staple, I went back to the front of the cushion and stapled along the edge out to each corner leaving one inch between each staple. Leave the corners for last and fold those over like your wrapping a present. Give the corners at least three staples. Trim any excess fabric. Don't worry if it doesn't look perfect. Remember no one will see under the chair. (Let's hope not a least.)

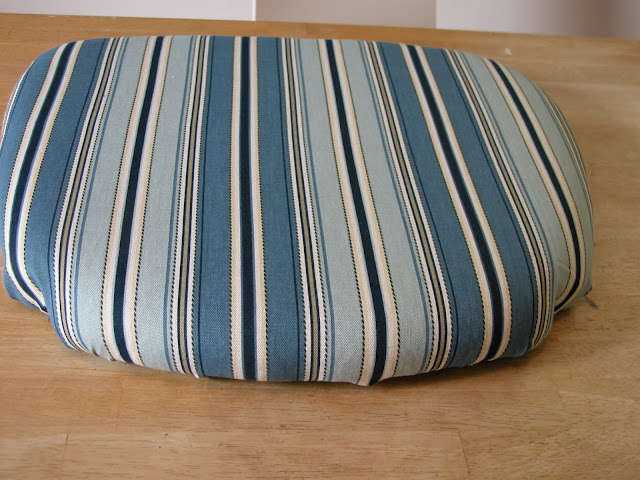
After you have stapled all around the chair and your hand and fingers are killing you from holding that staple gun, flip the cushion over and smile and give yourself a pat on the back. Now grab your screwdriver and screw it back on the chair.
That's it!! Only five more to go.☺


Here are the chairs dressed in their pretty new fabric
Now I think I'll invite friends over for some food and drinks

The table is set with blue and white plates

Crystal glasses, candles, beach glass & flour sack towels


The three white ceramic seashells are candle holders I placed beach glass inside of them instead of candles.


Now after all that hard work I'm going to sit back and relax.
The print above the chair is of my husband's former boat moored in the bay down the street from where we live. We stumbled upon it at a local art gallery. We were surprised!!!


