Pretty painted chest

February 24, 2014,

Hi Friends I hope you had a  wonderful weekend.  
We spent most of ours outside enjoying the warm weather and sunshine.  

Today I am sharing this pretty painted chest.  


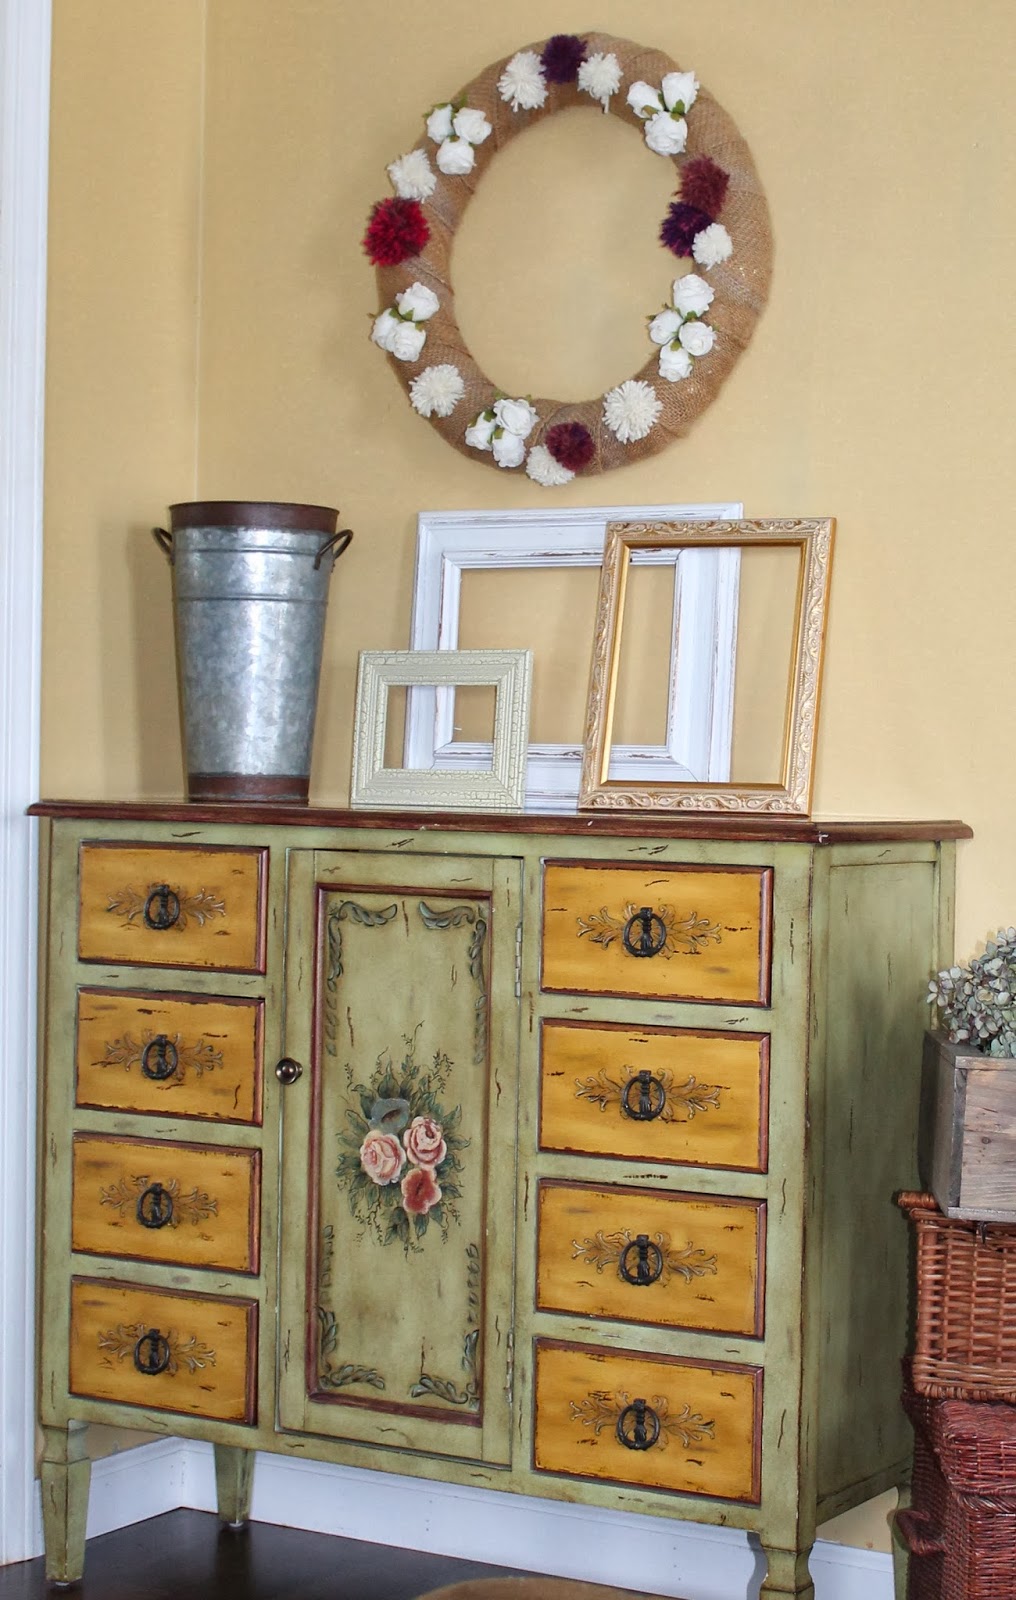
I love the size, it fits perfect in this tiny niche in the living room.  


It was made in the Orient and is hand painted and hand carved. 
I love all the pretty details.


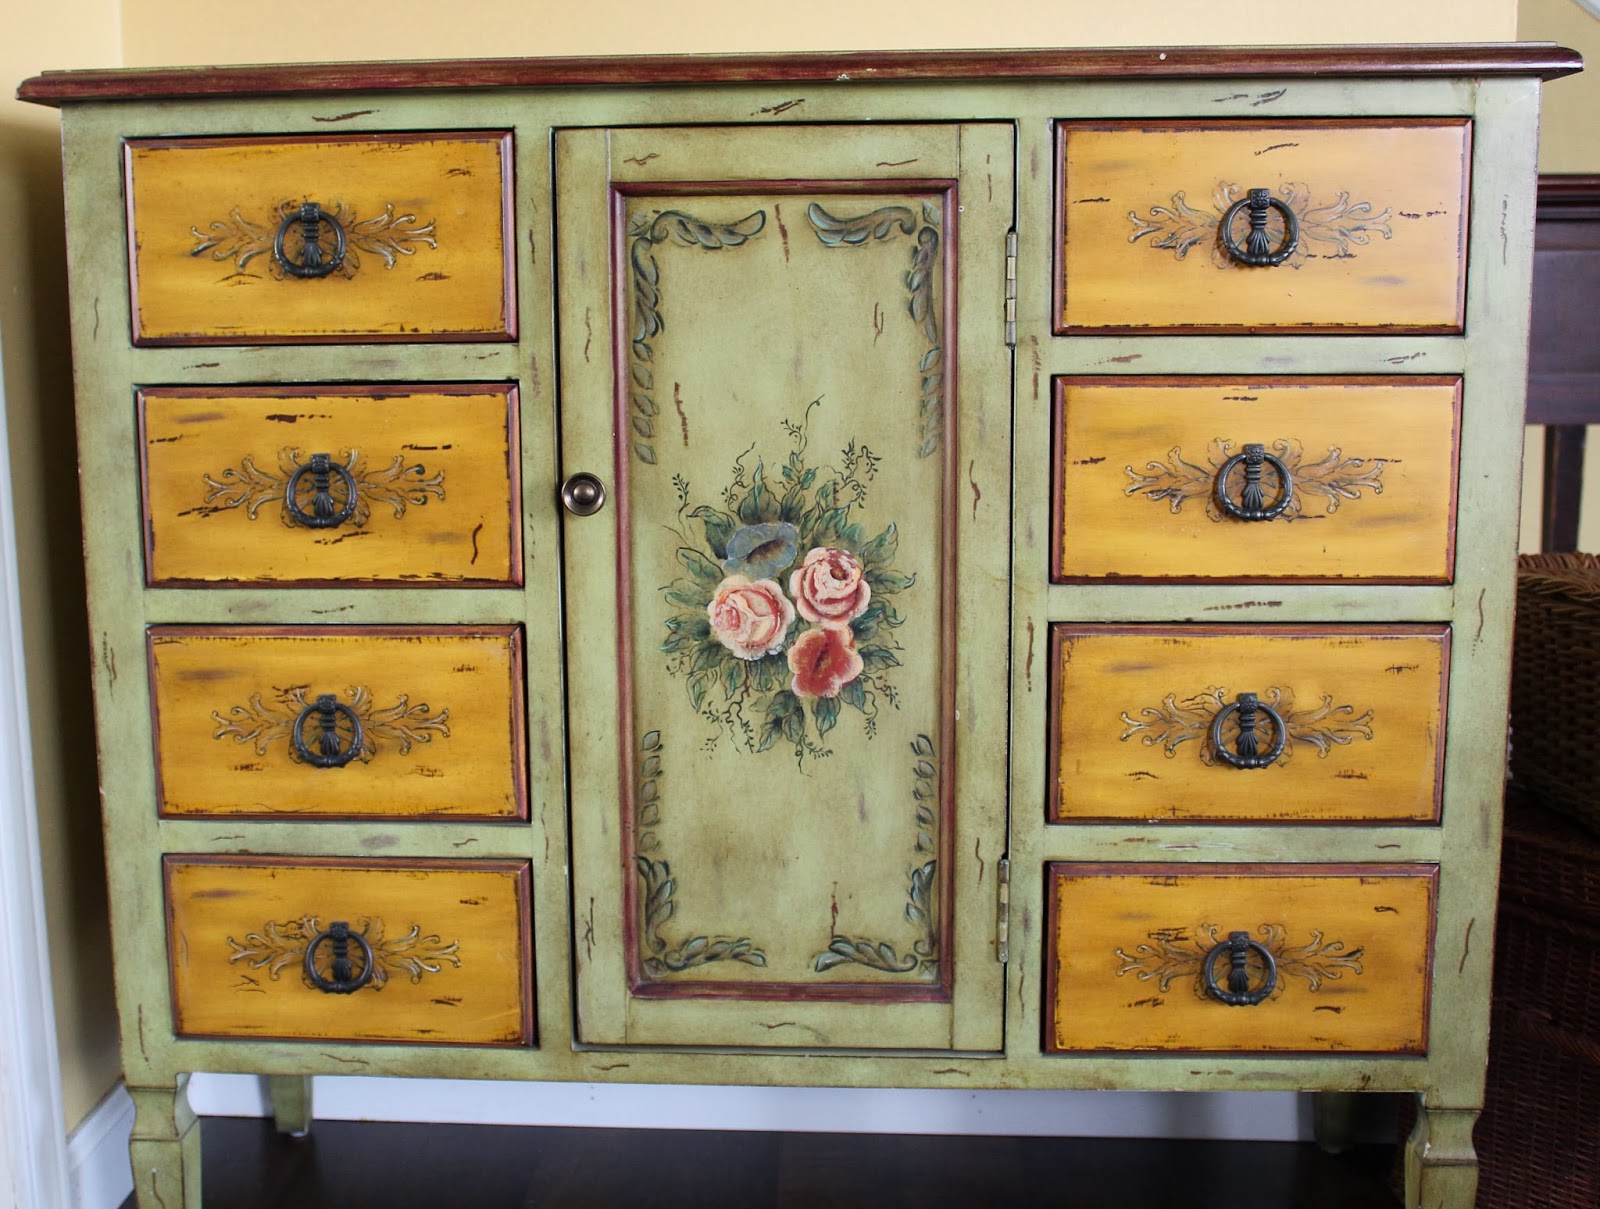
I love the color of the drawers. There are eight of them lined with velvet.  Inside the pretty rose painted door are two shelves.  This small chest packs a lot of storage.


The top is painted with red roses


This piece of furniture has been moved around my house so many times I can't count them.  When it was in the kitchen I had cloth towels hidden in the drawers and when it was in the bedroom I kept jewelry inside.
Moving furniture from different rooms is a great way to refresh a space and doesn't cost a penny.
For now this chest is staying put...at least for a little while.


Happy sunny day!!
Yeah!!  Finally, the sun is out and we are having a little thaw from the fidget weather.

Today I am sharing a quick tip for fixing scratches that are caused by our pets.
Before I could get out the previous post I had to fix scratches on this chair caused by this unassuming guy.

Cats in particular love to climb


When I sit in this chair my sweet kitty wants to hang out with me and uses the arm of this chair to climb up for snuggle time.

As you can see he did quite a number on the arm

I didn't want to photograph the chair looking like this, and since I was in the middle of posting I didn't have time to paint it.

Soooo...I searched my giant toolbox and found two black makers.


Searching

Two Permanent Markers


First I used the large marker to cover all the scratches.  Then with the extra fine point sharpie, I filled in the crevices.

The camera picked up some imperfections, but with the naked eye, you can't notice them at all.


  Now I was ready to photograph the pictures for my post.


And there you have it!!
bye-bye scratches


hello pretty!


Decorating A Corner In A Room

February 17, 2014,
{HELLO}

I have been thinking about this for a while... tweaking the workroom to make it more comfortable. I love cozy little corners in spaces, but they can be a challenge to decorate.  So how do you decorate a corner in a room?  I feel balance & proportion are important key elements to keep in mind.  This means choosing the correct pieces of furniture and accessories to fit this tiny space. Color choices also need to be considered.


Here are my steps for making a pretty corner in any room of your home.

Step 1
Choose the location in your room

My Very messy WORKROOM
Tweaking the area near the window

The first step was to figure out which corner to tweak.  I thought the dresser could be moved to a different location in the room.  It sits next to a window which lets in all the beautiful sunshine. I thought a chair would nice by the window.


Step 2
Choose your furniture
 I chose the black & white CHAIR that was in our computer room. It has a round back and is the perfect width and height for this spot. 
The next piece of furniture I selected was the stenciled TV TRAY.    This piece is light & airy and is the  perfect contrast to the bold chair.  


I added a small stool that doesn't take up a lot of space.  
You can read about the stool HERE.


Step 3
Add Artwork
I already had the artwork in place when the dresser was there.  Actually the artwork was my color inspiration for bringing in the black & white chair.  

Does anyone recognize who the artist is?
If you guessed Mary Engelbreit your right!!

The small frame hanging alone on the wall is my artwork


Step 4
Add Accessories

I wanted this corner to be clutter free so I kept the accessories simple and the color palette the same.

I let the art work be the pop of color.


I hope I inspired you to make a small change in your corner of your room.


We all need our little corners.

Thank You For Stopping By!


Heart Healthy Cocoa Powder

February 13, 2014, in

{Hi Friends}

A cup of hot cocoa is a nice way to stay warm and cozy on cold winter days.    


Did you know that a spoonful of this chocolaty goodness has health perks?


Here are some insights worth knowing: 

  1. Pure cocoa powder is made by roasting and grinding the bean of the cacao plant.
  2. Cocoa powder contains no sugar and is low in fat.
  3. A 2-Tbsp. serving contains 25 mg of caffeine.  So no worries if you want to sip this before bedtime.
  4. Cocoa powder is a great source of flavanols, the same heart-healthy antioxidants found in berries and red wine.
  5. Cocoa powder contains 10 calories per serving & has 2 grams of fiber.


Cocoa powder maintains its taste & antioxidant levels for at least a year if stored at room temperature in an airtight container.

Mine has been in my cupboard for about that long and it is still fresh
I sprinkle a dusting on my fruit, oatmeal, or yogurt for a yummy way to control those sugar cravings.


A few home-baked cookies are always good at any time.


Using one of my favorite mugs I purchased a while back is my small cure for the winter blues.
 It has one of my favorite flowers (Peony) painted on it.


Wrap A Gift In An Unusual Way

February 11, 2014,


Repurpose fabric into a pretty cloth envelope to give as a gift.


Create something special for that special someone by taking the time to wrap a gift in an unusual way.  My favorite way to do this is by using fabric.

I started with a hat.  My daughter wore this in a school play when she was in middle school. She was one of the seven dwarfs in Snow White, so hence the odd shape.
 It was already sewed on the sides so that was great for me!!  That step was already taken care of.

I used scissors, ribbon, buttons, needle, thread and fabric glue.

Here is what I did step by step

1
Fold bottom up

2
Fold top over to make a flap 


3
Cut and glue the bottom 


4
 glue ribbon on the opening of the flap to cover up the frayed edges. Make sure not to glue the opening closed.

For the bottom glue the material together then glue a ribbon on top.

5

I sewed three buttons on the bottom and glued a heart on the flap opening.


The flap opens up so you can put something special inside.
This will be my Valentine's Day gift to my daughter stuffed with all of her favorite candy. 


Never underestimate the impact of a pretty gift that shows you've taken the time to create something special

XO
Julie

Hello there! How are you?    

Do you love cream in your coffee? but not the fat. I have always used half and half in my coffee and tried on occasion to cut it out of my diet by using non- fat dairy products, or non-fat half and half.  These products are loaded with preservatives and never really taste that good. 

Since staying fit and healthy is on my to-do list for this year I needed to find the right alternative that I could live with and never miss the half and half again.

If staying fit and healthy is on your to-do list and you want to make a lifestyle change in what you add to your coffee and still be satisfied. You can make your own creamy topping using fat-free milk.  I thought I could never live without half and half until I tried this.

This is so simple 
      Shake Shake Shake your container of milk!!
This works best when the container of milk is low. 
Just shake it and the milk thickens and becomes frothy.  
Pour into your coffee and enjoy! 
You will love it!! 

Before

  
After

This satisfies the need for the cream and the best part is.... no fat or preservatives.
Try it you might love it!  
You have nothing to lose but the fat.

XO
Julie

© love my simple home · THEME BY WATDESIGNEXPRESS