HELLO FRIENDS!

Gallery walls are a simple solution to add a fun spin to any space in your home.  
Did you know they are really easy to create!  
Here is my No stress - No rules method for creating a gallery wall:
All you have to do is pick a theme and add a few of your favorite things. 
 It's that simple!! 


Do you have a blank wall in your home that is just screaming for attention?
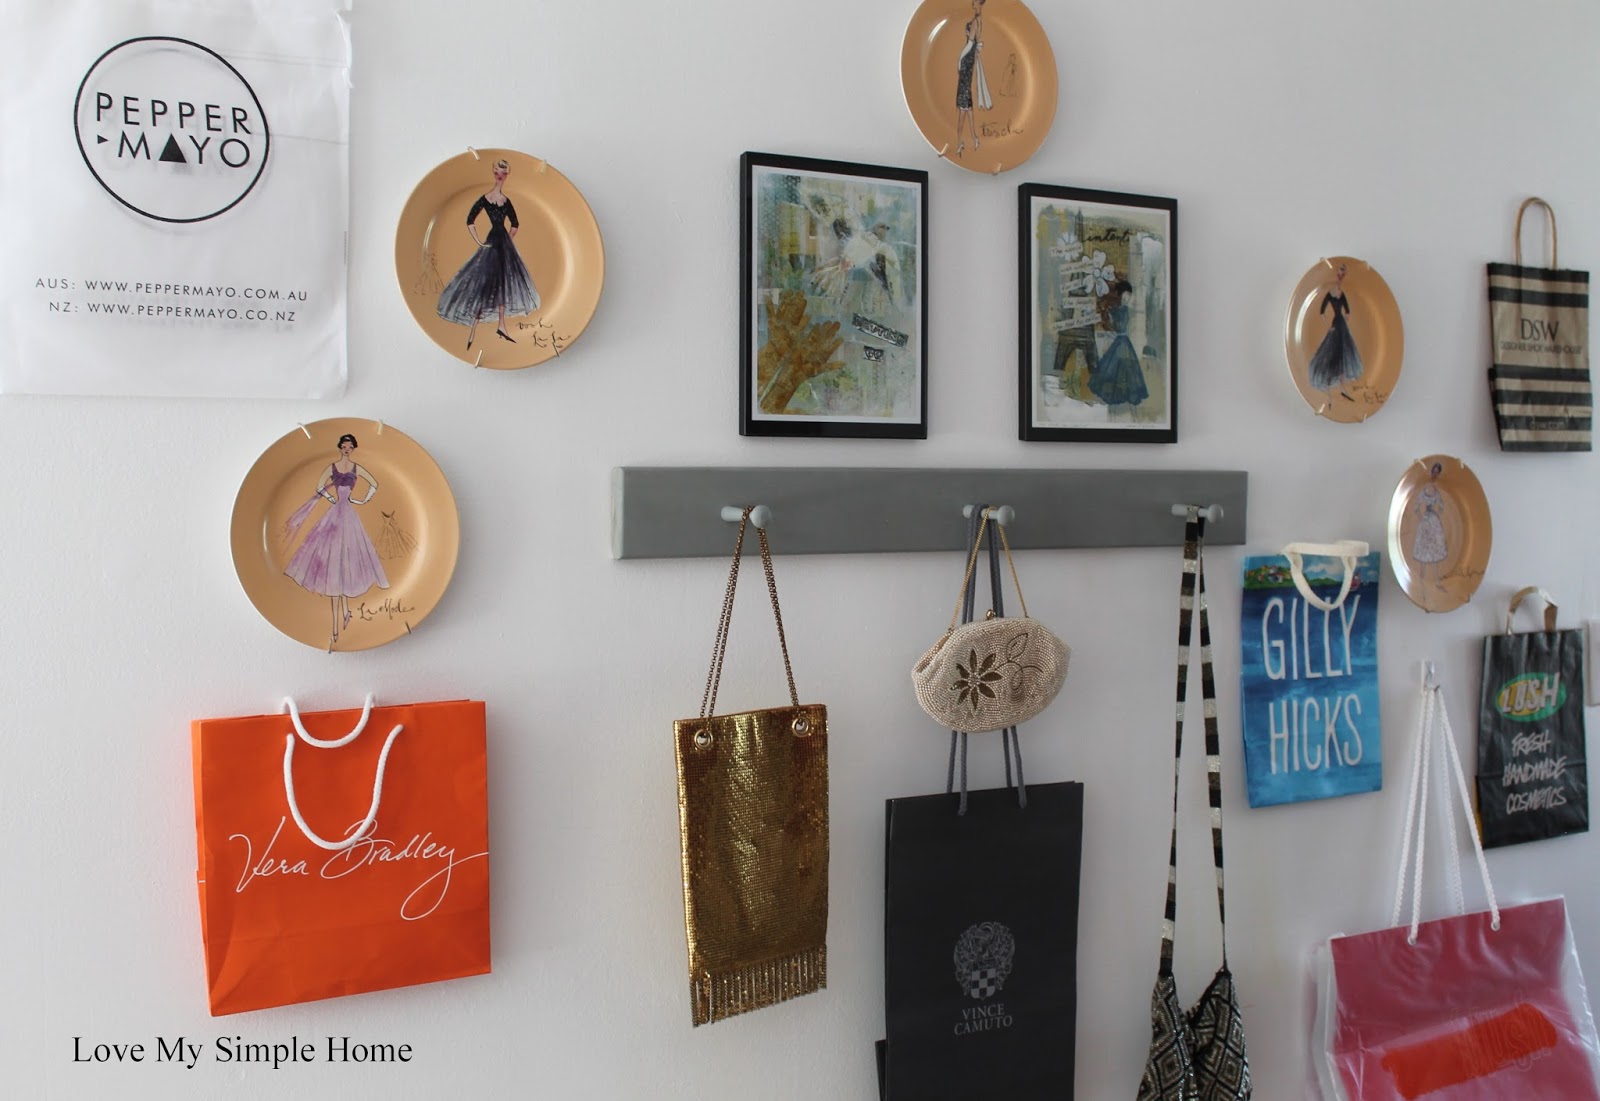
  Gallery walls are the perfect way to show your walls some love.  I put together this one in my daughter's bedroom using shopping bags from some of her favorite stores.


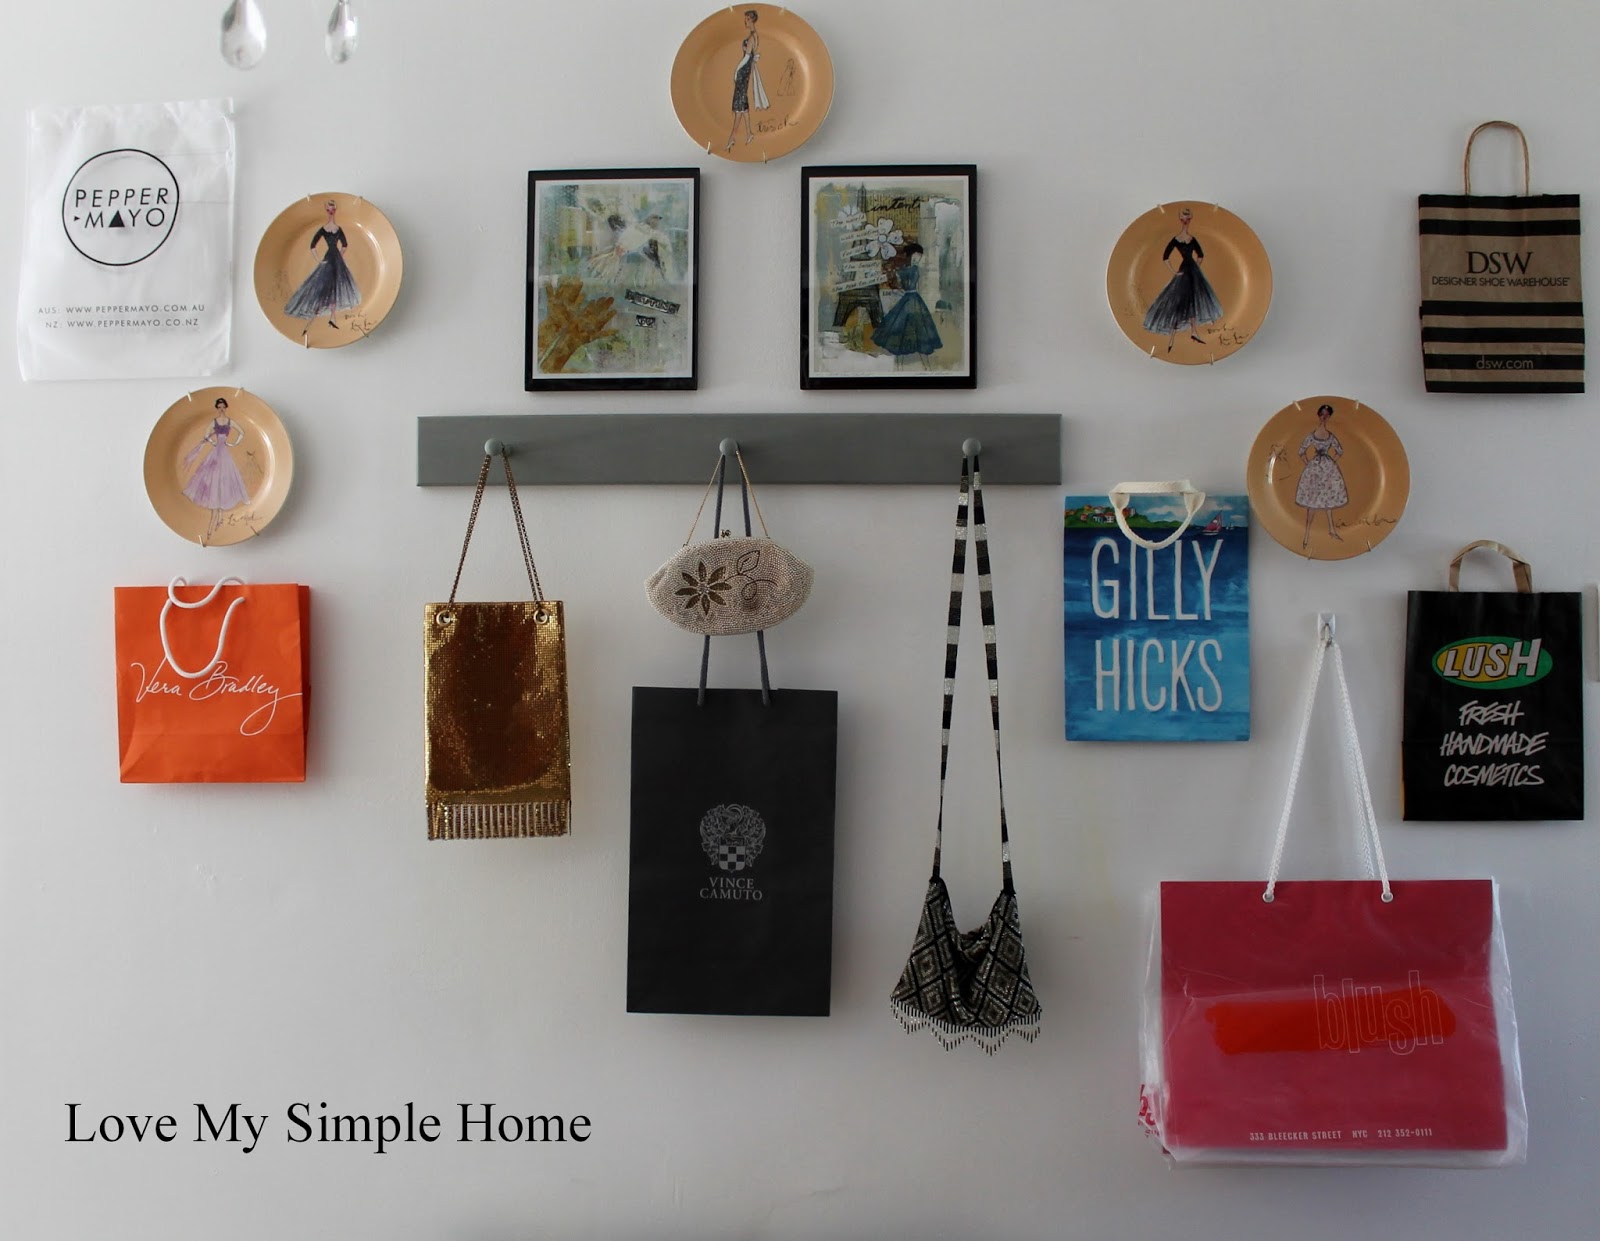
This neglected wall was screaming for attention.  The idea of making a gallery wall has been brewing in my mind for months, so while Chelsea was away at camp I thought it would be a good time to finally start and complete this project.  


Picking a Theme
It can be anything your heart desires

I picked shopping

I used Chelsea's collection of shopping bags, A peg wood rack, French dress plates, artwork, and vintage handbags. 

I started in the center of the wall by hanging the peg wood rack.  I added artwork purchased from Jeanne Oliver Designs above the rack.  Next, I placed one plate above the artwork and then working outward I hung two plates on either side of the rack.  I did a little measuring but most of the time I eyeballed everything by taking a step back and making sure things looked even.

I have a fear of putting too many holes in the wall so I only used nails to hang the plates and the peg rack.  I used command strips for the artwork and sticky dots to hang the bags.  Now the bags can easily be changed for new ones without damaging to the wall.

Hanging from the pegs are Chelsea's vintage handbags.


I hung the shopping bags last...
 It was as easy as 1 2 3.


 I love these vintage dresses.  I wish I could wear every single one of them!!


I love Jeanne's artwork!!
The one on the left says Letting Go
The one on the right says...The World Was Waiting For All The Beauty She Had To Offer


I hope I inspired you to create your own gallery wall with
No Rules - No Stress
JUST FUN!


Wondering what a puzzle stool is??  Puzzle stools are made with a solid piece of pine with carved out letters and blocks. They are made for children.

I just couldn't part with my daughters.  When she grew out of hers I kept it in my workroom.  After several years of being indecisive {Should I donate it or repurpose it?},  I decided to keep it and repurpose it into a chunky wood board for display.  


Here is the BEFORE  (minus the letters)
As you can see this was well used & has worn over the years.  I took the letters out and use them around the house for decorating bookshelves and tablescapes. 


I removed everything including the metal plates that hold the legs.


The legs are stored in a plastic bag... just in case, I want to turn it back into a stool.


After everything was removed I sanded the whole piece.
Then I used a weathered gray stain and craft paint to give it character.


I also stained the drawer pulls that were on our entertainment center.


I placed the board on chrome drawer pulls to lift it off the table during the staining process.   I was thinking of adding them to the bottom but they were too small.


I used hot glue to adhere the wooden drawer pulls to the bottom of the stool.  I like the rustic charm they add to the chunky board.


The last three letters of my daughter's name spell SEA.  Perfect for summer decorating.
 I love the primary colors of the letters.  It is fun to incorporate them into my decor.


I added a driftwood sailboat that I made using leftover fabric from the dining chair redo.


Chunky Reclaimed wood is all the rage these days.  
Here are two more ideas on how to get the look using a puzzle stool:

I love the look of reclaimed wood used for shelving in a kitchen.
 {Not that this is reclaimed wood}
 I would call it sentimental wood. 
 I think a few of these placed on brackets in a kitchen would look great! 
 {Skip adding the feet to the bottom of course.}

This would also make a really nice cutting board...just skip the staining process
instead, use several layers of mineral oil.


Can you tell this was a puzzle stool in its former life??
Hi, there sweet friends!  I hope you're enjoying your summer so far.  

I plan to finish a few projects while my kiddo is away at camp. She is training to be a camp counselor in a very challenging but fun program.  One of the projects I am tackling today is painting the deacon's bench.  This project has been on my mind for a while and today I am finally taking the plunge.

I wanted to see how the deacon bench would look on the front stoop.  I placed it against the siding of the house. A perfect fit, however, I did not like how all the cracks, dings and chips showed in the sunlight.  I thought a fresh coat of paint would do the trick to bring this precious piece out of its tired state.  I gathered my paints and supplies and went to town to give it a paint-lift.  { a face-lift for furniture}.  Here it is before the paint-lift.  At first, I felt guilty covering up the original stain. After it was painted I was happy with the results.


Here is what I used for the paint-lift.

 First I filled in the long crack with wood filler, wiped the bench off of any dust and then painted.


I experimented with a Tintable Sample Deep Base paint (eggshell) from Sherwin Williams.
It's a great price and goes a long way!


YIKES!
This is what it looked like after it dried.....Not very pretty right??  I nearly freaked out until I did the next step......
MIXING  a paint sample jar of Valspar latex paint called Satinado a MINTY GREEN to the base paint.  This did the trick and I started to feel happy again.
To protect the paint from the rain I sealed it with a protective finish.
I used Minwax Polycrylic clear gloss.


HERE IT IS AFTER THE PAINT-LIFT

ALL DRESSED UP AND READY FOR SUMMER!


You can still see the crack but not as noticeable.


Thank you to those who stopped by for a visit to my
Hooray for summer home tour- living room.  It made my day reading all your lovely comments!
 Here is the link for anyone who might have missed it...


WISHING YOU AND YOUR FAMILY A SAFE AND FUN FILLED FOURTH OF JULY!!

© love my simple home · THEME BY WATDESIGNEXPRESS