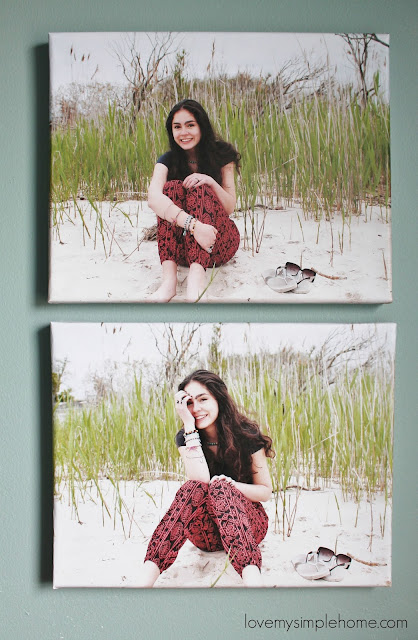
Turn your favorite photographs into canvas art and completely transform your space.  Putting photo prints on canvas is a simple and stylish way to display your photographs!  All you need is a printer, card stock, mod podge, and a paintbrush.


art-that-can-completely-transform-your-space-love-my-simple-home

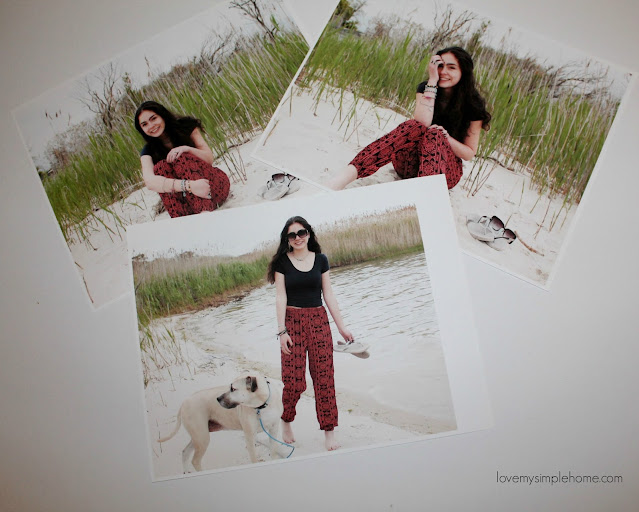
First, print your pictures from your computer onto white cardstock

love-my-simple-home

For this project, I used two 8 in x 10 in canvas boards that I purchased on sale at Michaels.  


Use a paintbrush to apply a thin coat of mod podge to the canvas board


Next place your printed photograph on a clean flat surface facing down, place the canvas that you just brushed with the mod podge on top of the backside of the photograph. Make sure when you place the canvas on top of the photograph all of the edges are aligned.  Now paint a strip of mod podge along all of the edges of the canvas and fold the edges of the photograph onto the back of the canvas. Use a utility knife to slice each corner of the photograph, fold the corners in overlapping them.  Brush on a small amount of mod podge on the edges to seal.  That's it, now you have your own custom artwork to adorn your walls.


art-can-completely-transform-your-space-lovemysimplehome.com

art-can-completely-transform-your-space-lovemysimplehome.com


art-can-completely-transform-your-space-lovemysimplehome.com


{Hi Sweet Friends}

With Valentine's Day just around the corner, I thought it would be fun to make a pom-pom bouquet.

No green thumb or florist skills required.

forever-blooming-pom-pom-bouquet-love-my-simple-home


Supplies:

Branches or Twigs


Instructions:

Gather some Branches and Twigs


Next, make pom-poms

Make pom-poms out of yarn.....Here is a tutorial on how to make a pom-pom
  If you're not that crafty you can purchase pom-poms at the craft store or use this pompom maker kit.

I made my pom-poms using different color yarn.


To make the bouquets.....
Simply add a dab of hot glue to the tip of the branch or twig and insert it into the center of each pom-pom. The glue dries quickly so you only need to hold it in place for a few seconds.


Then arrange the bouquet in a container of your choice.


Varying the height of the branches I arranged the blossoms in three green bottles.
Using red and white bakers string I tied an antique key to the neck of the middle bottle and I placed heart hoop earrings around the neck of the other two bottles.


These crafty blossoms will bloom forever and ever!

When you think of your dream workspace what do you think of?  For me...I think of my little room in the back of our garage.  It is my little world where I work, create, and blog.  I feel happy and comfortable in this space, surrounded by the things I love.

 If you enjoy DIY projects scroll down for ideas on how to create your dream workspace by repurposing furniture and using items that you already have.


The fun part of decorating a workspace or home office is letting your imagination go.  I mean you can add certain decor in a workspace or home office that you wouldn't necessarily put in the rest of your home.  Make your space as personal as you can.  In other words, break away from traditional decorating and just go with your gut and have fun.


If you work from home like I do you will need a designated area to call your office!  For some that might mean a cozy spot in one of the living spaces in your home or a room that no longer functions as it used to.  If you have enough square footage in your room create different work zones; for example, set up one zone for working on projects and another zone for office tasks.  If you have a co-worker think of setting up two different work areas in the space.  That might mean using two desks on opposite sides of the room or butting the desks together facing each other.  

My co-worker set up a cozy spot on the window sill.


Here are a few before pictures.
It's a horrible mess as you see and I can't wait to show you all the pretty.


My husband and I renovated this room together.  Our small budget included a new floor, molding, and paint. Sadly new furniture was out of the question, but I have a knack for repurposing things including furniture.  In this space, there was a large entertainment center.  My plan was to take it out of the room but it was too heavy to move and any attempt to even try would have resulted in a serious backache.  Soooo I took a step back and looked at this piece of furniture in a different way.  I saw that the top can become a desk, the drawer shelves, the knobs hooks, and the glass door a frame.  I decided to keep it and repurpose the parts. I grabbed a crowbar and screwdriver and carefully took the whole thing apart.  The top became my desk, the drawers became shelves and the glass door became a frame for this picture.  
Furniture dilemma solved so far!


Here are the pretty pictures after all the grunt work was done.  
Come on in I'll show you around


I set up different work zones in the space.  The farm table is my work table. I placed it in the middle of the room so I can easily move around it when working on a project. I set up two storage areas and a desk to work at for e-decor projects and for keeping up with my print shop.  I recently added a chair in the corner of the room.  It is a comfortable corner to take a break from the computer, gather my thoughts, and sip a cup of coffee. 


I knew this room was going to get messy with paint spills, so I went with a laminate floor.  Laminate is easy to keep clean.  A damp sponge with soap and water does the trick.  My husband installed the new floor...  It turned out great!

I painted the walls, White Dove, by Benjamin Moore,  It is a warm white and I love how it makes the room light and bright.

I had to get even more creative with the furniture pieces since there was no budget for new purchases. I decided to use some of my old furniture but in a different way. The farm table that was in our kitchen in our other home is now my work table, the dresser was my daughter's diaper changing table, now it is used to store fabric swatches and office supplies.  On top of the dresser is one of the drawers that came from the entertainment center.  I painted all of the drawers white and added antique navigational maps behind the dividers.  They now have a new purpose as shelves. The small drawing in the white frame is my daughter's masterpiece, made when she was a baby.  Oh and that incredible toolbox came from a consignment store.


My dream workspace is flooded with sunshine. Sunshine makes me happy and this is why I love this room so much!

The cabinet below was a roadside find, it is holding up one side of the desk. The two white pillars hold up the other side. The top of the desk was the top of the entertainment center.


I added some personal items on top of my desk.  An antique decorative wooden bowl was purchased at a consignment shop.  The caricature in the gold frame is me and was made by a local artist.   The dancer in the frame is my artwork.


My sweet husband bought me a dozen roses after we completed the room.  I decided to dry a few and place them in a tarnished antique dish.


I placed jelly jars filled with buttons, craft supplies, and other personal touches on the shelves.  The shelves were the drawers from the entertainment center.


I repurposed a frame into a bulletin board and hung it next to the work table. You can check out the tutorial here.


My co-worker is very happy watching me work in my fun creative space...


Thanks for visiting my dream workspace!
This space has evolved over the 6 years since I started blogging.  I think it's important to make updates to your workspace as you and your company grow.  If you make small adjustments to your space as you evolve, your space will be yours to enjoy.
© love my simple home · THEME BY WATDESIGNEXPRESS