This strawberry yogurt smoothie is quick and easy to make, it is my go-to recipe when I'm craving something sweet!

This post contains affiliate links

INGREDIENTS:


First, crush the ice in a BLENDER with orange juice (about a half a cup)

Then add the following:

Stonyfield Oikos Organic Nonfat Greek Frozen Yogurt (Vanilla)  1/2 cup or more

Dannon Plain Nonfat Yogurt 1/4 cup or more

Bunch of Strawberries

Blend until it looks thick and creamy

 Drink and Enjoy! 


Wow, summer is just flying by.  To me, it seems to be the quickest season out of all and it happens to be one of my favorites.  We are enjoying lots of days relaxing at the beach.

two-frames-used-two-ways


I am so excited to share this project with you!  I created frames that you can use in two different ways.

1


2


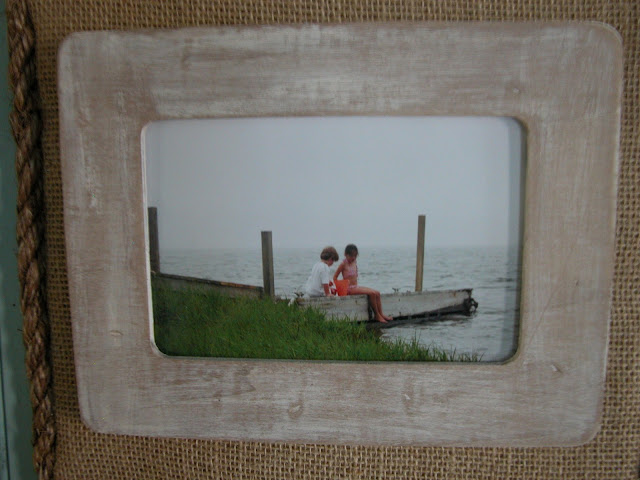
My inspiration came from these adorable pictures that I took of my daughter and her cousin when they were 6 and 7 years old.  This was taken at the end of our street.
We have since lost the dock and the grass dune from all the storms that hit our area.
So this is a nice reminder of how it use to look and of how fast our kids grow.


I wanted to do something special with these pictures for many years.  I found this piece of beadboard in our basement.  


The first step was to measure and cut.  My husband did that part for me.  He is very handy and always willing to help me out.   My plan was to get at least 5 boards from this one piece of beadboard, but it wasn't large enough so I had him cut two large pieces.   16" x 16"

 I sanded and painted it.


The paint was a free sample from Lowes


I purchased 6 unfinished wood frames (4" x 6" )  for a $1.00 each at Michaels


I glued two magnets on the back


Next, I distressed the frames using a hammer and a screwdriver.  Then I stained them using a staining mixture of steel wool and white vinegar.


After the stain dried.   I painted the frames using leftover paint (Benjamin Moore White Linen).
After the paint dried.  I sanded using 100 grit sandpaper.  Now the frames have a worn beach look.


The second part of the frame is the layer that goes on top of the beadboard.  I used foam board cut to size 10" x 10" and burlap cut 12" x 12".  I glued the burlap to the foam board using a spray adhesive.


I cut pieces of metal and glued them to the burlap.  This will hold the 4" x 6" frames.
The top of a tin can will work too.


Next, I used Gorilla Glue to adhere the foam board on the beadboard.  I just followed the directions on the bottle.  Then I used my hot glue gun and crazy glue to glue rope around the edge of the foam board.
You can purchase the rope at any home improvement store or boat marine store.


The final part of the project was to nail the picture hangers on the back of the beadboard.  I used large self-leveling hangers on two sides.  This way you can hang it horizontal or vertical.


After that was complete I hung them on my wall in my living room.


Here the frames are hung in the vertical position


The TV tray was in my neighbor's garbage. There were two of them. I transformed them using a stencil method and spray paint.  I'll tell you about that at a different time.


I tied the leftover rope around this pretty wine bottle added my hydrangea's and beach glass to a glass bowl for a simple summer look. 


Here you can see the transformation of the unfinished frame. 


HERE IS HOW YOU CHANGE THE PICTURE

 Pull the frame off the magnets. Take out the picture and put a different one in.  


Turn the board horizontal and return the frame.


NOW YOU HAVE A NEW LOOK


Here is another close up of the frame that I stained and painted


Isn't she cute! That was my daughter when she was 3 years old.  She is now 14.

This is a great summer frame to capture all your summer moments or old memories.


Have fun and enjoy your summer!


Simple Wreath

July 03, 2013, in
Hi Friends,  Here is a simple wreath project that anyone can make, even if you think you are not that crafty.


I used a grapevine wreath, silk hydrangeas, and burlap, all purchased at Michael's Craft Store.
Here is my tool list:
Hot Glue Gun
Scissors


First I snipped the flowers off the stems.  Then I tucked each one into the wreath in a U shape.  I started in the middle and worked up each side. There was no need to use glue because the stems fit tight between the vines. I decided not to use the leaves but I saved them for a different project.

To make the bow I used burlap from a roll. I cut about 12 inches or more off the roll. I loosely tied the burlap around a doorknob to make the bow. Now, why would I do that you may ask?  Because this stuff is really cumbersome to work with and after fighting with it for a while I discovered that if  I tied it to something I could manage it better.  So hence tying it to the doorknob worked.  After I was satisfied with how it looked I gently pulled it off and fluffed it into shape. I folded the ends and snipped them to get that V shape.


Then I glued the bow on top of the wreath.

And now I have a sweet wreath for my front door.


© love my simple home · THEME BY WATDESIGNEXPRESS