Bohemian Tapestry

April 20, 2015, in
HELLO THERE SWEET FRIENDS! 

I hope you had a wonderful weekend!  The weather here in New York was beautiful! 
We spent most of our weekend outdoors.  Fresh Air, Sunshine.... lovin' It!!
We even took a ride on our boat!  

During spring break, my daughter and I went shopping for a tapestry for her bedroom wall. We went to several stores but no luck, so she decided to shop online for one.  She purchased this one from Urban Outfitters on clearance.  I love her savvy shopping skills. She must have picked that up from me.  If you are interested in buying one you can find a similar one HERE.


Her bedroom has gone through several transformations.  She went from soft pink walls to bright pink then to all white.  She is now interested in giving her bedroom a Bohemian makeover.  Which means a Lot of Color!!


The string of white lights adds to the Bohemian look and so does the dream catcher.


New bedding and a lot of pillows will be next on the list.  

This is certainly a wow factor when you walk into her bedroom. 
 It's a work in progress and we are almost there.  
Soon I will be sharing the rest of her Bohemian bedroom makeover.

HAVE A GREAT WEEK!


Hey everyone guess what?
Spring has finally arrived in New York!!  

It is the perfect day to make a colorful spring wreath.


For this simple wreath I used:
one bouquet of silk pansies
 one roll of turquoise burlap
one Styrofoam wreath form
straight pins
twine
wire cutters
two buttons
needle and thread
scissors


NO GLUE INVOLVED
{that makes me smile}


FIRST
Wrap the burlap around the wreath form
Use two straight pins: one in the beginning and one at the end to hold the burlap in place.


Cut the extra burlap and pin in place.


NEXT
Use wire cutters to cut the stems of the pansies.
Then gather the stems together and wrap twine around them to hold in place.
Then bend the stems downward and clip any stems that are showing.


THEN
Use whatever kind of ribbon you'd like. Tie it around the twine and the stems then make a bow.
I used wired ribbon.


Sew two buttons on top and you're done!


No gluing involved... now when summer comes along I can take the whole thing apart and make a summer wreath.


FINALLY
DISPLAY AND SMILE

On A Shutter


On A Window Frame


 On A Door

You can display this wreath inside your home or on your front door in a covered area.


Guaranteed to make you smile!! 
HAPPY SPRING!

Hello Happy Monday!
I hope you had a great weekend!!

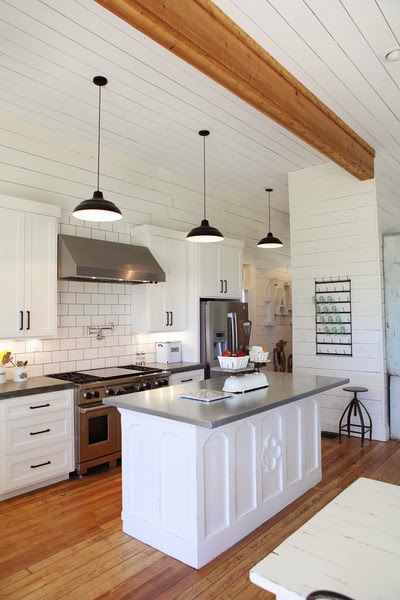
What do you think of using outdoor lighting for your indoor space?
I would love to bring a large barn light into my kitchen.

 I've been shopping online for one.
 Dreaming 
of a Coastal - Industrial - Farmhouse look.
{boy that was a mouth full}

I am Swooning
 Over the barn light pendents in Joanna & Chip Gaines kitchen from
HGTV The Fixer Upper. 
One of my favorite shows. 
Source


MY LITTLE KITCHEN


Below are a few of my favorites I came across.
                                               

We have 8-foot ceilings so I am shopping for either a flush mount or stem mount fixture.
I am also looking for a fixture that can use a high watt bulb
{for maximum lighting for the entire kitchen.}


My #1 Pick Is
{Stem Mount}


#2
{Stem Mount}


#3
{Semi-Flush Mount}


Amazon


#4
{Flush Mount}


Amazon


#5
I love the color of these lights


There is also Overstock, Home Depot, Lowes and so much more.

Do you have a favorite?
Which one would you choose for your kitchen?

{Hi Friends}

I hope you all had a wonderful Holiday weekend! 

This week my daughter is on spring break.  I am looking forward to spending quality time with her. We will be doing some shopping, decorating & rearranging her bedroom.  She likes the Bohemian look and we are on the hunt for a tapestry to hang above her bed.  

Today I want to show you how to add casters to your furniture  


This project was a joint effort.  My sweet husband purchased the four black casters at Walmart.  WHY? Because I mentioned to him that someday I would like to put casters on these bookshelves. NOW, why? did he only buy four?  You may ask?   BECAUSE... he knows me very well and he knows that I could change my mind at any second, but this time I didn't.  The minute I laid eyes on those beauties I knew I wanted four more.  The next day we went to Walmart to purchase them and guess what... NO BLACK CASTERS.  I was disappointed because I really wanted black.  Well, we decided to buy four gray rubber swivel casters, which are kind of cool because now I can steer the bookshelves.  I ended up putting the black ones in the front and I hid the gray ones in the back. 


   BEFORE  

My husband gave me a quick lesson on how to add the casters.  While he did the first bookshelf  I watched carefully stepping on his toes a million times!!!  

Thank goodness I was able to do the second one myself...Yippie!!


HERE IS WHAT YOU WILL NEED:

A drill with a thin drill bit and a black sharpie or pencil.
{I know the bits have names.... sorry I'm not sure what the name of this one is.}

Here is a picture of it.


                                                   Step by Step On How To Add Casters:

  1. Line your caster up evenly along the edge of the bottom of your furniture.
  2. Use your sharpie to mark where you will predrill the holes.  I put one dot in the middle of each circle of the caster.                      
  3. After you made your four dots with the sharpie use the drill to predrill the hole, but don't go all the way through the wood.  You just want to drill enough so it is easy to drill the screws in.
  4. After you predrilled the holes take the screws and drill them all the way through the wood.
  5. That's it...now do the same for the rest of the casters.
  6. When you're finished you can decorate your shelves.


                                                                    AFTER


© love my simple home · THEME BY WATDESIGNEXPRESS