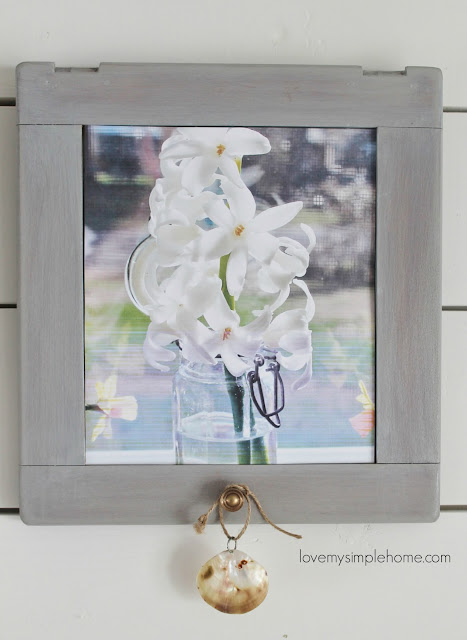
Hi friends, I'm so glad you are here!  Today I am sharing a simple repurpose project using cabinet doors.  Did you know cabinet doors can be repurposed into frames?  I used two doors from an unused china hutch to make these cute frames.
simple-repurpose-cabinet-doors-frames

simple-repurpose-cabinet-doors-frames


This post contains affiliate links

For this repurpose you will need:

Cabinet doors
Sandpaper
Wood Stain or Paint
Rag to apply the stain
paintbrush
Wood Filler
Sawtooth picture hangers
Double-sided tape
Pictures to put inside your frames

Before

How to make the frames:

Remove all of the hardware and sand the cabinet doors with a fine-grit sandpaper.  I sanded the outer part only because the picture will be placed in the middle covering it up.


I used wood filler to cover the holes.  I plan on reattaching the knobs so I didn't fill in those holes. 


I used Varathane wood stain on the part I sanded.  The color is called Sunbleached.  You can purchase it HERE   I didn't sand the middle part of the doors because that is where the pictures will be placed.  After I finished staining the frames the middle looked unfinished, so I painted it.  So glad I picked this sample up for 50 cents!   


I used a sawtooth picture frame hanger on the back of the frames. 

And double-sided tape to hold my pictures in place.


I cleaned the knobs with a baking powder and vinegar solution, then I reattached the knobs to the frame. 


I chose two of my own photographs to put in the frames. Hyacinths are one of my favorite spring flowers, I love them for their fragrance and delicate blooms. When I go grocery shopping I usually pick one or two up for my home.

simple-repurpose-cabinet-doors-frames


I hung the frames above my mantel to give it some spring love.

simple-repurpose-cabinet-doors-frames


simple-repurpose-cabinet-doors-frames


simple-repurpose-cabinet-doors-frames


simple-repurpose-cabinet-doors-frames


I found this key at Michaels Craft Store and hung it from the knob.  

simple-repurpose-cabinet-doors-frames


A pretty seashell hangs from this frame.

simple-repurpose-cabinet-doors-frames

I hope you enjoyed this repurpose!

Click on the links to see more repurpose projects using cabinet doors

door-frame-love-my-simple-home


repurpose-cabinet-door-frame-love-my-simple-home


driftwood-frame


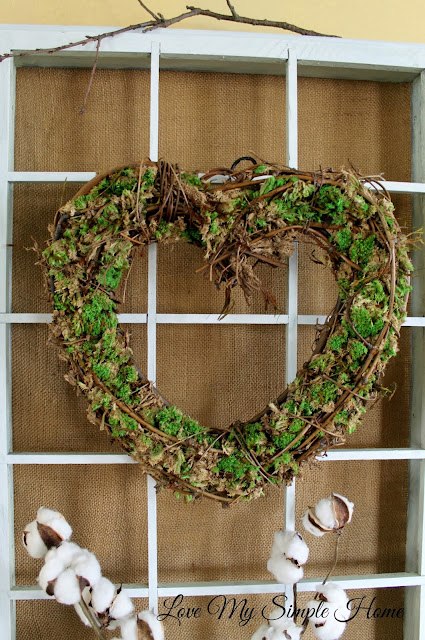
BRING AN ORGANIC TOUCH TO YOUR HOME WITH A DIY TEXTURED MOSS WREATH.  

love-my-simple-home

This post contains affiliate links.

SUPPLIES

One package of preserved moss
love-my-simple-home
I purchased mine on Amazon.  


One grapevine wreath (any shape will do)
love-my-simple-home
    
 Fixative Spray 
This will keep the moss intact.  
I used Krylon fixative spray.

The moss is very messy to work with!!  
Before you begin, put newspaper down on the surface you are working on, this will make cleaning up a lot easier for you!  

ARE YOU READY TO GET STARTED?  

IT'S AS EASY AS 
                   1                                  2                                 3love-my-simple-home

1. Start with a grapevine wreath form. Any shape you desire. 

2. Pull the moss apart and break it into small pieces. 

3. Starting at the top of the wreath tuck each piece of moss in-between the vines following the shape of the wreath.  Fill in as many gaps as you can.  When you are finished, spray the fixative over the entire wreath.

THAT'S IT!

Now you have a fabulous mossy wreath to show off on your front door or inside your home.    
love-my-simple-home


Please pin for future use

Hi friends, I'm back with another simple Mother's Day gift idea.  This DIY fabric jewelry gift box was made using an empty can of nuts!


This post contains affiliate links.  That means if you click on one of those links, I will be compensated a small amount at no cost to you.  

In my previous post, I showed you how to make fabric flower planters using empty nut cans. You can read that tutorial here by clicking on this link  DIY Fabric Flower Planters-Mother's Day Gift


For this project I used:

Fabric Flower Planter (tutorial in the previous post)

Hammer

Small Screwdriver

Bottle Topper (I used one from an empty oil diffuser bottle)

I used a hammer and a screwdriver to make a hole in the middle of the lid. I simply tapped the screwdriver with the hammer to make the hole.  Then I twisted the bottle topper inside the hole.
 That's it so Simple!

There are many useful ways to use this container.  I am using it as a jewelry box to store my costume jewelry which I will never part with.  You can also use it as a gift box by putting a gift inside and giving it to someone you love.  Mother's Day is around the corner so if you like to DIY this might be a fun project to make and give to your mom.  How about using it to store paper clips and rubber bands on top of a desk.  What would you put in your container?  I'm sure you have some great ideas!


Make sure to check out this post: DIY Fabric Flower Planters Mother's Day Gift for the tutorial on how to make the planters.


Please Pin for future use


© love my simple home · THEME BY WATDESIGNEXPRESS