DIY Tin Can Vase

February 18, 2016, in
Hey, friends, I'm glad you stopped by!  I want to let you in on a little secret......I love tin cans!  I use them in my workroom to hold paint brushes, scissors, pencils, glue sticks and so much more.

Tin cans are made to hold liquid, so they are perfect to use as a vase.  Today I want to show you how I used two tin cans to make one vase with an antique finish.

diy-tin-can-vase-love-my-simple-home


This is how I turned two into one

BEFORE:
I started with Two Empty Soup Cans

diy-tin-can-vase-love-my-simple-home

A Basic Can Opener is the only tool I used for this project.

diy-tin-can-vase-love-my-simple-home

I took the bottom off one of the cans with the can opener

diy-tin-can-vase-love-my-simple-home

Now I have a cylinder

diy-tin-can-vase-love-my-simple-home

 I used LIQUID NAIL ADHESIVE to join the two cans together.

diy-tin-can-vase-love-my-simple-home


Now it is one tall vase

diy-tin-can-vase-love-my-simple-home

To give it an antique look...I used a foam brush and gave it several coats of black craft paint.  I mixed and layered different craft paint colors.  I used: black, burnt umber, turquoise & gold metallic craft paint.

diy-tin-can-vase-love-my-simple-home


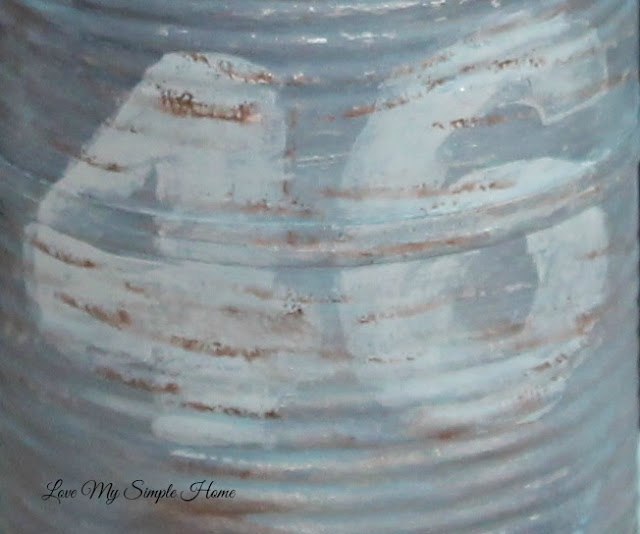
I made stencils by cutting numbers off a tag. (The kind you get when you service your car)  I painted the back of the numbers gray and pressed them on the can and peeled them off.  I used a thin paintbrush to fill in the empty spaces.

diy-tin-can-vase-love-my-simple-home


I love how the cotton spray stems look in the vase!!  The stems come in a set of three and you can purchase them at  Wayfair.com.


Happy Valentine's Weekend My Friends!

I love Epsom salt...have you tried it? 
Epsom salt can be used in many ways and has many health benefits. 
 One of the ways I love to use it is in the tub.


Epsom salt can be purchased at the drug store for a few dollars.  
It is high in magnesium and is absorbed through the skin.  

Treat Yourself good with my soothing BATH cocktail recipe:
Mix two cups of Epsom salt and one Tablespoon of coconut oil in warm/hot bath water.
This all-natural remedy soothes my achy muscles and leaves my skin silky smooth.
For aromatherapy, I add lavender oil.


I love Epsom salt so much... I put it in this pretty glass bottle that I recycled.  I personalized the bottle with a faux pearl monogram and a bright pink ribbon purchased at Michaels craft store.
It's the perfect me gift or a sweet gift to give to someone you love.


Treat yourself good and have a Beautiful Valentine's Day! 

How To Make A Pom-Pom Snowball

February 10, 2016, in ,
Hi, friends...Are you enjoying the winter or are you thinking of spring?  I have spring on my mind, but mother nature...thinks differently.  It's been snowing here for the past three days so I've been busy making snowballs...not the frosty kind but warm fuzzy snowballs made with yarn.

how-to-make-a-pom-pom-snowball-love-my-simple-home

 I put together an easy tutorial for you to follow  

You will need:
yarn, scissors and your hand
love-my-simple-home

Cut a strand of yarn about six to twelve inches long and lay it on a flat surface.  
You will use it later to tie your pom-pom

love-my-simple-home

Using the skein drape a strand of yarn over the front of your hand

love-my-simple-home

Wrap the yarn loosely around your hand about 100 times

love-my-simple-home

Carefully slide the yarn from your hand and place it on top of the piece you previously cut.

love-my-simple-home

Lift both sides up and tie a tight knot on top of  the rolled yarn

love-my-simple-home

 Tie a tight knot!!
love-my-simple-home

Next cut all the loops
love-my-simple-home

After all the loops are cut, the soon to be pom-pom will have a lot of spider legs
YIKES!

love-my-simple-home
Don't worry you are heading in the right direction. 


Hold your pom-pom in one hand and give it a good trim all around.

love-my-simple-home

 Keep trimming until it is round like a ball.


This is what it should look like when you are finished.

how-to-make-a-pom-pom-snowball-love-my-simple-home

You can cut off the two long pieces of yarn or leave them intact.
 It all depends on how you want to use your pom-pom.


For easy cleaning up use a Ziploc bag to store all the fuzzy clippings.
The clippings can be used for stuffing for other craft projects.

love-my-simple-home

how-to-make-a-pom-pom-snowball-lovemysimplehome.com


If you missed my post on how to make a pom-pom bouquet you can check it out here by clicking on this link Forever Blooming Pom-Pom Bouquet

how-to-make-a-pom-pom-snowball-love-my-simple-home


 Happy Friday!  

Hi friends..it's another stormy winter day here on Long Island, with up to 12 inches of snow expected. I thought it would be the perfect day to stay inside and cozy things up for Valentine's Day.  
 I like to use what I have and keep it Simple
Do you remember the roses I purchased from the grocery store?  How to Revive Wilted Roses  Yes I still have them! I dried the blooms and arranged them in a marble mortar and scattered the petals in a blue & white transferware dish.
This wreath is so easy to make...it's ridiculous
Simply cover a corn wreath form with burlap and tie a ribbon around it. I used black and white plaid ribbon that I already had. I made the vintage sheet music hearts a couple of years ago. You can check out the post at the bottom of this page for an easy to follow tutorial on how to make them.  I also added a bonus post for those who like red and white for Valentine's Day.


Simple pom-pom bouquets and a photo of my daughter that I made are added to the entryway chest.


Here is the link on how I made the vintage sheet music hearts:


Plus The Bonus Post Using Red & White:


So tell me how you like to decorate for Valentine's Day?...
Do you go all out or do you keep it simple like me?


Hi, Friends!  Have you thought of bringing your wicker furniture inside for winter?  That's exactly what I did!  Wicker furniture isn't just for summer!  You can bring it inside and give it a fresh and elegant look for the winter months. Use pillows, cushions, and a throw blanket to make it warm and comfortable.

            
Decorating can sometimes be challenging but if you have a step-by-step plan it makes it a whole lot easier to follow through.  For example, first, choose an empty space in your home and think of the colors you would like to use.  Adding more blue and white to this space was something I had in mind for a while and I knew that this sunny spot in our dining room would be the perfect place to start.  


After you choose the space you want to work with, it's time to pick out the furniture.  Measure your space and choose a piece of furniture that will fit the space. This wicker loveseat was on my patio and is the perfect fit.  After a good cleaning, all I had to do was give it a coat of crisp white paint and add a couple of cushions on top.


The red cushions were not ideal.  No problem.....I used a blue plaid shawl to cover them.  Notice how the color and the texture of the shawl change the look of the loveseat.


Pardon our dog Molly, she spotted a squirrel outside and ran in front of the camera just as I snapped this picture.

NEXT
BRING ON THE PILLOWS  

Solids, stripes, and patterns all work well with white wicker.


Bring in accent tables and accessories. 
This brings the space to life! 

I used an antique marble plant stand as a side table and placed a nautical lamp on top. An antique bench and a tray hold a vase of roses and magazines.  The bench is also a good spot to kick your feet up!  All I have to do is remove the tray. 


Fresh flowers are always a must for me, especially in the winter.  Do you recognize the roses?  They are from my previous post.


A stack of baskets makes it easy to hide clutter and can also be used as another side table.


I hope I inspired you to use your wicker furniture inside for winter.


Hi sweet friends!

There's nothing like a bouquet of roses to brighten up the winter months.  I purchased these lovely pink roses at the grocery store and added some pine cones for a pretty winter display.

how-to-revive-wilted-roses-love-my-simple-home


how-to-revive-wilted-roses-love-my-simple-home

What happens when your pretty roses wilt?

 I completely forgot about the roses while putting the groceries away. 


This is how I revive wilted roses:

Cut about an inch off all the stems on a slant     


Add the commercial-cut flower food packet to the water.  Change the water every one to two days.
Cut the stems just a tiny bit every time you change the water.  This will help them survive longer.  As your roses get shorter and shorter you will need a smaller vase.  The heads on the roses will get bigger and the stems will be shorter, it will feel like you have a whole new bouquet.

how-to-revive-wilted-roses-love-my-simple-home


As you continue to cut the stems you will eventually end up with just the heads.  You can float the heads in water in a shallow bowl and continue to enjoy your roses.

how-to-revive-wilted-roses-love-my-simple-home


 Hello friends 
I hope your new year is off to a good start.  I have been busy organizing my workroom and desk.  I needed a place to hold pens, pencils, and paintbrushes.
I came up with a simple solution using the marble base of trophies. 

A marble base pen holder for your desk!

I love the idea of repurposing!

It is easy to dismantle trophies. 
Just unscrew all the parts using a screwdriver.
You will be left with all this gorgeous marble and be in marble heaven. 
Most of the trophies came from yard sales.  The fancy girl in the top hat is my daughter's dance trophy she earned when she was about 10 years old.  My beautiful girl is now 17 and will be graduating high school this year...Boohoo...I left that one intact... however I did take apart her participation trophy from soccer and repurposed a pen holder for her.


 I found two pens that fit perfectly.

Did know that some trophy bases are made from Carrara marble?  Would you throw that away?  Not me, that's for sure!  I have seen beautiful kitchen countertops made from Carrara marble.  I am dreaming of one in our home someday, but for now, I am happy with this small piece on my desk.


The larger bases are perfect for craft brushes and pencils.


If you enjoyed this post
I have two more inspirational ideas on how to repurpose trophies:
Repurpose Old Trophies

DIY Bottle Toppers


© love my simple home · THEME BY WATDESIGNEXPRESS